


You have invested in a premium 4K laser projector to experience a true cinema feeling at home. You start a blockbuster, expecting brilliant colors and dazzling highlights — but instead, the picture looks unexpectedly dark. Details in shadow areas are barely visible, and bright clouds look like featureless white patches.
Frustrated, you dig through the settings and come across the term Dynamic Tone Mapping. In forums, some “purists” recommend turning it off for a more natural image. Others strongly recommend enabling it.
The truth is: most advice online refers to OLED TVs, not projectors.
In this guide, we explain in technical terms what Dynamic Tone Mapping (DTM) actually does, why it is often crucial for ultra-short-throw projectors (UST), and how to set it optimally for movies and gaming.
What is Tone Mapping? (Simply explained)
Before we talk about “dynamics,” we need to understand the basic problem.
HDR films (High Dynamic Range) are mastered in studios on reference monitors that can reach extreme brightness levels — often 1,000, 4,000, or even 10,000 nits (cd/m²). Most home theater projectors (and many TVs too) cannot physically display these peak brightness levels.
If your projector were to display the signal unchanged, it would result in so-called clipping: Anything brighter than the projector’s maximum output would simply be shown as pure white. Cloud structures or details in an explosion would be lost.
Tone mapping acts here as a “translator.” It translates the film’s extreme brightness range so that it fits into your projector’s displayable range. The goal is to preserve as much detail as possible in both the brightest highlights and the deepest shadows.
Basic knowledge: Still unsure about the difference between older TV standards and the new technology? Read our guide to SDR vs. HDR in the home theater.
The problem: Why is the HDR image often too dark?
The most common criticism of HDR projection is an image that feels too dark. This is often due to the way tone mapping works.
Static Tone Mapping (The old standard)
The standard format HDR10 uses static metadata (e.g., MaxCLL and MaxFALL) that applies to the entire film. The projector has to derive a single tone-mapping curve for the full runtime from this.
- The downside: The projector has to make compromises. If it optimizes the curve for a very bright beach scene, a dark cave scene later in the movie will often be displayed too dark. The image looks flat.
Dynamic Tone Mapping (The modern solution)
Dynamic Tone Mapping (DTM) works more intelligently. It continuously adjusts the tone-mapping curve — often scene by scene or even frame by frame (depending on the manufacturer).
- The advantage: It is as if the brightness control were being recalibrated for every moment. In dark scenes, the curve is adjusted to make shadow details visible; in bright scenes, it is corrected to avoid blown highlights.
Important note: In formats such as Dolby Vision or HDR10+ dynamic metadata is already present and specifically guides the tone mapping. Here, the projector does not have to “guess” but follows defined guardrails. However, tone mapping still takes place to adapt the image to the hardware.
The “projector factor”: Why TV tips often do not apply here
In many hi-fi forums, you will read: “Turn off dynamic image enhancers so the picture isn’t altered.”
This advice is usually correct for OLED TVs in completely dark rooms. For projectors, it is often counterproductive in practice.
A projector does not emit light on its own like a TV; instead, it projects reflected light onto a 100 to 150 inch screen. As a result, luminance (cd/m²) across the large surface is physically lower than with a TV.
Without Dynamic Tone Mapping, HDR on the large screen often looks too dark because the projector holds back brightness reserves for highlights it can hardly display. DTM on projectors is therefore often not a “fake effect,” but a necessary compensation, to preserve image impact and shadow detail.
Gaming special: HGiG or DTM?
Gamers often face a dilemma: maximum visibility (to spot enemies in dark corners) or maximum signal accuracy?
Option 1: Dynamic Tone Mapping (DTM)
- Pro: Actively brightens shadow areas and delivers a high-contrast image. Ideal for games in rooms with ambient light or competitive shooters.
- Con: Because the projector performs image processing, this can increase input lag (input delay), depending on the model and mode.
Option 2: HGiG (HDR Gaming Interest Group)
HGiG aims for the display to largely disable its own tone mapping and rely on the console’s HDR calibration.
- Pro: High signal accuracy and often lower input lag, since less image processing takes place.
- Con: On projectors, the image with HGiG often looks darker than desired, since many games are primarily optimized for brighter TV displays.
Practical example: Dolby Vision Gaming
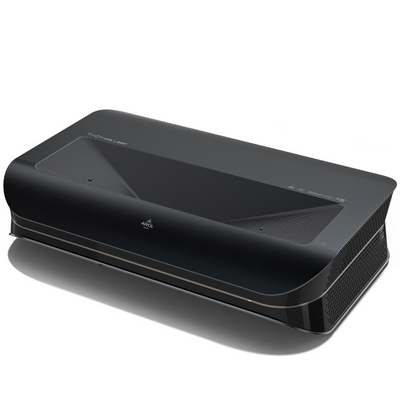
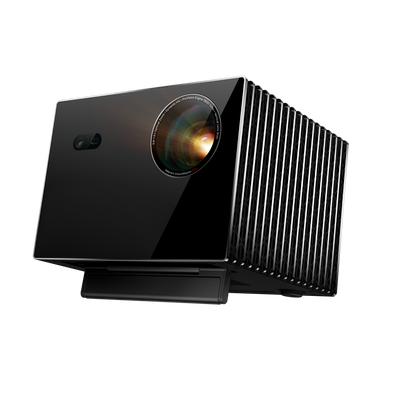
Some modern projectors, such as the AWOL Vision Aetherion Max & Pro, support Dolby Vision for Gaming (e.g., on Xbox Series X). Here, the console provides dynamic metadata, enabling precise control without aggressive display-side DTM. AWOL states an input lag in the 1 ms range for the Aetherion in the relevant mode (at 240 Hz), as well as VRR/ALLM support (manufacturer claims).
The hardware base: Why software alone is not enough
An algorithm can only work as well as the hardware running it. A DTM algorithm on a projector with low brightness often results in little more than a washed-out gray image. For true HDR, two physical properties are crucial:
- Light reserves (lumens): To make highlights (such as headlights or stars) shine, the projector needs brightness. The Aetherion Max is specified at 3,300 ISO lumens, for example (Aetherion Pro: 2,600 ISO lumens), which gives the tone mapping more room to work with (“headroom”).
- Native contrast: Tone mapping often has to brighten dark areas. If the projector does not have good black levels, black turns into dark gray. High native contrast (AWOL cites, for example, 6,000:1 for the Aetherion) ensures that even brightened shadows retain depth.


Checklist: The optimal settings for your home theater
To get the most out of your laser projector, we recommend the following basic settings as a starting point:
- Picture mode: Start with Filmmaker Mode or “Cinema.” These usually offer the most neutral color tuning.
- Tone mapping:
- For HDR10 movies: Set “Dynamic Tone Mapping” to ON (or “Medium/High,” depending on room brightness).
- For Dolby Vision / HDR10+: This setting is often controlled automatically, as the metadata drives the mapping.
- Screen: HDR benefits greatly from a high-contrast screen (ALR/CLR). This improves black levels in rooms that are not optimized, making the tone mapper’s job easier.
Common misconceptions about DTM
- “DTM always distorts the picture.” No. On projectors, it is often necessary to make the image visible at all (“visibility over accuracy”).
- “No tone mapping happens with Dolby Vision.” It does, but it is much more precise because it is controlled by dynamic metadata rather than by the projector’s guesses.
- “More lumens automatically mean better HDR.” Not on their own. Without good contrast and clean tone mapping, a lot of lumens can just look “milky.”
FAQ: Common questions about HDR tone mapping
Why is my image brighter with Dolby Vision than with HDR10?
Dolby Vision uses dynamic metadata. Each scene is matched to its brightness. With standard HDR10 and DTM disabled, the projector often bases its mapping on the brightest values in the entire film, which can unnecessarily dim darker scenes.
Does Dynamic Tone Mapping increase input lag?
Yes, additional image processing can take time. For gaming, always use the dedicated Game Mode on your projector, which disables unnecessary processing steps (except for the required tone mapping).
Which is better: HDR10+ or Dolby Vision?
Technically, both are dynamic. Dolby Vision is more widely supported (Netflix, Disney+, Xbox). Devices that support both formats (like the Aetherion) offer the greatest flexibility.